Raspberry Pi + FreeBSD Series
This series of guides about creating a home server with Raspberry Pi and FreeBSD is written by a novice for novices. If you’re pretty experienced with FreeBSD and are just looking for a specific answer to a question, unfortunately you might find these to be a bit verbose. For that reason, each article comes with a toggle switch to transform it into a succinct article. I wrote the guides in this style because, as I have learned *nix systems throughout the years, I have always found documentation frustrating. The well-intentioned authors of most *nix tech guides aim for efficiency and succinctness, which is good except they frequently assume the reader knows things they don’t. Then you have to start Googling that one piece that wasn’t clearly explained, or you have to experiment and figure out if some command contained variables that need to be replaced or not.
In verbose mode, these articles over-explain and provide tangential information that many who have any experience with *nix will find elementary. Basically, it’s what I always wanted when learning this stuff.
- Home Server with Raspberry Pi & FreeBSD
- Home NAS Using a Raspberry Pi
- Bastille Jail Management on Raspberry Pi
- Pi-Hole with FreeBSD using AdGuard Home
I started this series explaining how to turn a Raspberry Pi into a NAS, skipping this initial step because I didn’t think a guide was necessary. I provided a link just in case. Then I started having regret concerning my chosen setup and started tinkering with other options. After blowing things up several times, I’ve now returned to my original plan, which includes FreeBSD installed on the SD card with UFS as the filesystem and a ZFS mirror consisting of two external SSDs.
Necessary Equipment
Prices tend to fluctuate so I just listed what I paid. They should be approximately right. For the Raspberry Pi, check out RPI locator. They are extremely hard to find right now (2022). When they’re available for the suggested retail price on Amazon again I’ll add a link.
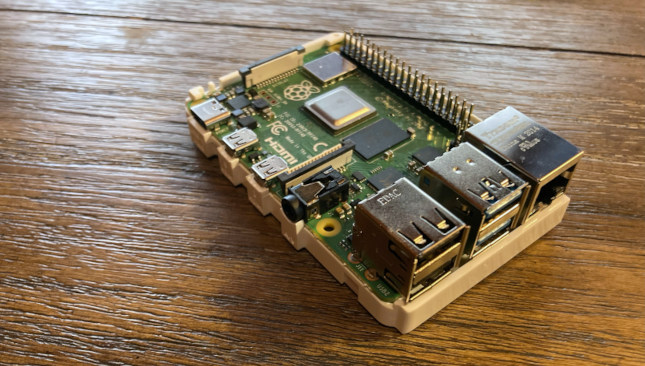
$35 (1) Raspberry Pi 4
Although you could technically do this on an earlier model, I would advise against it. The Pi 4 isn’t fast, but it’s significantly faster than the previous models. Plus, it’s the only model to include USB 3.0 ports. Note that $35 will get you the 1GB RAM model. I use a 2GB ($45) and they go up to 8GB for $75. I might upgrade to an 8GB since I plan on throwing a lot at this thing, but so far the 2GB has held up well.
$18 (1) Raspberry Pi 4 Accessories
You’ll need to buy your power supply and case for the Raspberry Pi separate. This kit gives you those and some heat sinks and a fan. If you do everything in this series at least the heat sinks would be a good idea.
$8 (1) Micro SD Card
The primary drive for your Raspberry Pi (sounds scary, I know). Since I am just using the SD card for the OS and some other basic software (Wireguard, Pi-Hole), I went with a 32GB because it was cheap.
$60 (2) 2.5″ SATA SSDs
These are your standard laptop hard drives. You could go with old-school spinning drives and it probably wouldn’t drastically change the performance since this is getting routed through USB and then the Pi, which probably bottlenecks things. You can get these pretty cheap, such as the PNY drives I use. Better drives do perform better and probably last longer. If I’m happy with this setup I may upgrade in the future.
You may see some guides online using USB thumb drives for a similar setup. I highly discourage you from doing this because those drives are not designed for the constant read-write operations.
$20 (2) 2.5″ Drive Cases (SATA to USB 3.0)
These are cheap and easy to find. The SSKs I use cost about $10 a piece. I picked them because of the aluminum housing. There are all sorts of other options you could go with, but these are about as minimal as you can get.
~$141 Total
You may need to spend a little more for a power cable and case, or any other Pi accessories you may desire. You may also need an adapter or reader to use the SD card on another computer to install the operating system.
What Are Your Home Server Needs?
To avoid the hassle I experienced, I suggest you consider your options. There are some key factors you should probably evaluate:
- Cost. One of the main reasons to use a Pi is to do things cheaply. If cost is not an issue, then there are much better solutions. TrueNAS is pretty much FreeBSD with a GUI just for an in-home server. You can buy their snazzy hardware and your configuration will be kept to a minimum.
- Efficiency. A Pi will draw a lot less power than a TrueNAS or an old repurposed x86 computer. Using ARM will allow you to keep the Pi running 24/7 without consuming a lot of power. This reason may overlap with cost, but you might want to keep power consumption down for environmental reasons.
- Speed. The Pi—even the Pi 4 used in this tutorial—is pretty slow. It should have plenty of power to do the things in this guide, although I may need to upgrade to a Pi with more RAM since ZFS likes a lot of it. I’m writing this as I go so if I run into any speed issues I’ll come back and edit this, but I will say that I have used a Pi for many of these tasks and speed has not been an issue.
- Availability. Unfortunately, finding a Pi is difficult right now (try RPI Locator). If you can’t find a Pi and want to set up a home server using FreeBSD and the tasks detailed in these guides, you can also use another micro PC or just an old computer laying around. Just keep in mind the PI-specific parts of the guide won’t apply and you might have to do a bit of research to make sure FreeBSD plays nice with your hardware.
Alternative FreeBSD Home Server Options
This list probably isn’t exhaustive but these are some ideas I tinkered around with before settling on my current setup:
- ZFS on the SD card. Use an SD card adapter to plug a SD card into the Pi through USB, run the installer from either an SD card directly in the Pi or a USB drive (if the latter, you have to do some futzing around to get the Pi to boot from USB). You can then use the installer to use ZFS directly on the flash card. The reason for the adapter is that I couldn’t get the FreeBSD to recognize the SD card unless it booted from it. Perhaps there’s some additional software that can solve this problem, but I didn’t find it.
- Use a single SSD as your zpool and don’t use mirroring. This actually isn’t a bad option if you have another backup solution set up. In a future guide I’m going to set up rsync to backup my drives to another device on the network. I also might use rsync to back up some of my more crucial data to a remote server. Combining those solutions with my ZFS mirror is kind of a “belt and suspenders” type of solution. The advantage of going with a single drive is that the u-boot bug won’t prevent you from booting into the external drive over USB, you’ll be be able to forego the SD card entirely, and things will be slightly easier to configure.
- Get the Pi Compute Module 4, the Computer Module 4 IO Board, a PCI board that will connect a bunch for SATA drives, and 4+ SSDs to make a RAID. I almost went this route, and I might do so in the future as a fun project, but keep in mind this is not economical.
- Buy a used Mac Mini for dirt cheap and a used HDD enclosure. This option is a bit overkill for my needs, but probably won’t cost you much more than the Pi setup. A ten year old Mac Mini is more power than you’ll need to do these tasks. If you get a used HDD enclosure just make sure it’s not a “hardware RAID,” as it may be difficult (or impossible) to get it to run on anything other than Windows or macOS, and you want ZFS to manage your RAID/mirrors.
Install FreeBSD on Raspberry Pi
1. Install Raspberry Pi USB Boot Firmware
Note: This step only applies if your Raspberry Pi 4 was made before September 2020, and only if you want to boot from USB.
Early models of the Raspberry Pi 4 won’t boot from a USB drive with the default firmware. There are two ways to update this. If you already have a SD card with Raspberry Pi OS installed, boot it up and do the following (copied from Raspberry Pi Documentation):
- Update Raspberry Pi OS to get the latest version of the rpi-eeprom package.
- Run sudo raspi-config
- Select Advanced Options
- Select Bootloader Version
- Select Default for factory default settings or Latest for the latest stable bootloader release.
- Reboot
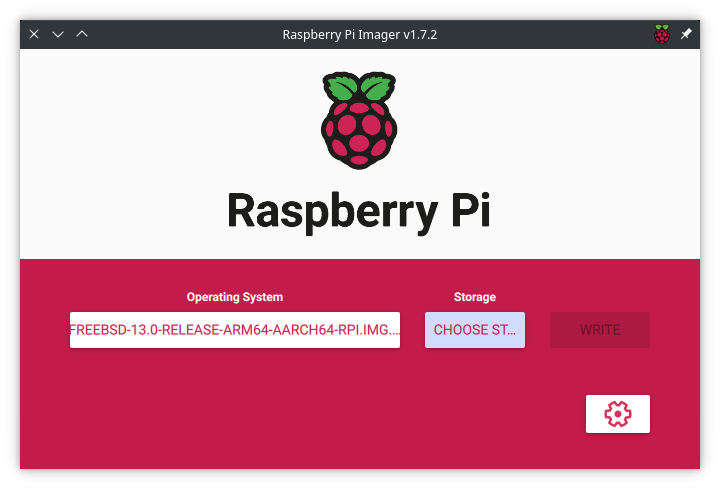
If you don’t have a card with Raspberry Pi OS, you can use the Raspberry Pi Imager Software to write to an SD card modifying the firmware to boot from USB (also copied from the Raspberry Pi Documentation):
Raspberry Pi Imager provides a GUI for updating the bootloader and selecting the boot mode.
- Download Raspberry Pi Imager
- Select a spare SD card. The contents will get overwritten!
- Launch Raspberry Pi Imager
- Select Misc utility images under Operating System
- Select Bootloader
- Select a boot-mode i.e. SD (recommended), USB or Network.
- Select SD card and then Write
- Boot the Raspberry Pi with the new image and wait for at least 10 seconds.
- The green activity LED will blink with a steady pattern and the HDMI display will be green on success.
- Power off the Raspberry Pi and remove the SD card.
2. Download Pi image from freebsd.org and copy it to an SD card.
Make sure you download an image that ends with “RPI.” At the time of this writing, FreeBSD 13.1 is the most current release. 12.2 is still supported but I have heard that it’s not good with the Pi hardware. Open up the Imager application and select the OS image.
This might take a while, depending on the speed of your USB port and the flash drive.
3. Boot Pi from Drive
Insert the drive drive into the Pi and boot it up. Once it has booted, log in with the default username root and password root. If you want to install FreeBSD on an attached hard drive, you can insert it.
For my setup, I’m going to start by hooking up some 2.5″ SSDs and creating a mirrored zpool. I’ll run FreeBSD off the SD card, but use the attached drives as storage. If you want to install FreeBSD on an attached drive instead, type bsdinstall.
In future articles, I’ll make a file server, setup jails, and then setup a DNS adblocker. I’ll keep tinkering with the Pi and adding additional guides that document my progress.