Verbose (article contains many explanations and tangential information)
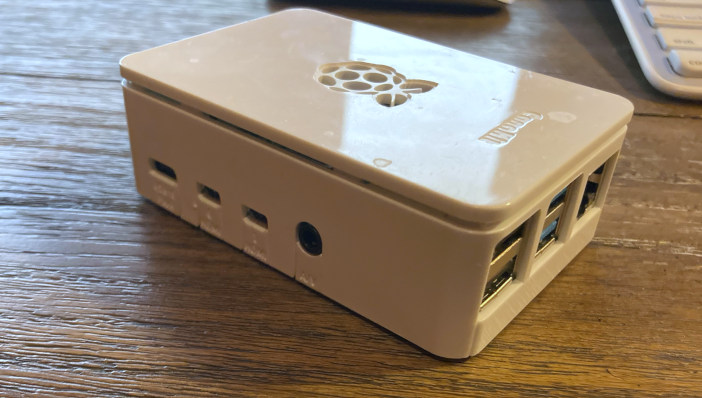
In this tutorial I explain how to make a home NAS using a Raspberry Pi, FreeBSD, and a couple of 2.5″ SSDs.
As the type of nerd who writes essays and publishes them on the internet, it probably comes as no surprise that I also tinker with technology. I also have multiple devices I use around the home. A desktop computer, a personal laptop, a work-issued laptop, an iPad, etc.
Previously, I had used a Raspberry Pi as a little home server and it worked out pretty well. I used Samba to create a shared folder that all my devices used as the official home of all my data. Using rsync, this backed up to my desktop. The system seemed great until the desktop drive began to fail and I lost faith in the whole thing. I’ve also decided to start storing media on the Pi, which will require some extra storage. My solution is to turn the Pi into a NAS (network attached storage).
I chose FreeBSD because it’s my favorite OS (runs this website!) and because its default use of ZFS makes it the best system for managing storage (see TrueNAS). The Raspbian OS that comes with a Pi has some strange quirks that I could never really get over. Also, while I’m not one of those nerds who rails against the evils of systemd, I do think that for hobbyists and beginners it’s easier to learn without it. The plaintext config files of FreeBSD are easier to understand and helps a beginner learn what’s going on when they set up networking, daemons, etc. Unfortunately, only with version 13.0 has FreeBSD run on a Raspberry Pi without requiring some real hacking. I noticed that not much documentation existed, so this article is my attempt to contribute to the FreeBSD community by making it easier for others to get started with FreeBSD.
A pedant might note that technically I’m setting up a ZFS mirror, which is functionally (if not technically) the same thing as RAID 1. This means I use an even number of drives (2) and they contain duplicate information. If one fails the other is still good. This isn’t the most efficient setup to maximize the amount of available data, but it’s good for a cheap home server since there are only two USB 3.0 ports on a Raspberry Pi 4. I used RAID in the title because that’s probably what people who need this guide will search for, and it’s kinda-sorta what we’re doing here.
Necessary Equipment
Prices tend to fluctuate so I just listed what I paid. They should be approximately right. For the Raspberry Pi, check out RPI locator. They are extremely hard to find right now (2022). When they’re available for the suggested retail price on Amazon again I’ll add a link.
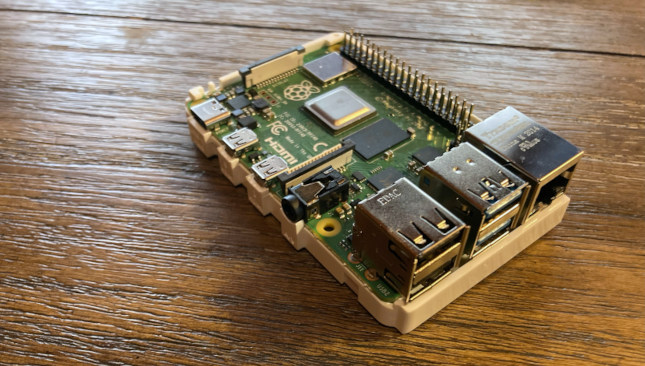
$35 (1) Raspberry Pi 4
Although you could technically do this on an earlier model, I would advise against it. The Pi 4 isn’t fast, but it’s significantly faster than the previous models. Plus, it’s the only model to include USB 3.0 ports. Note that $35 will get you the 1GB RAM model. I use a 2GB ($45) and they go up to 8GB for $75. I might upgrade to an 8GB since I plan on throwing a lot at this thing, but so far the 2GB has held up well.
$18 (1) Raspberry Pi 4 Accessories
You’ll need to buy your power supply and case for the Raspberry Pi separate. This kit gives you those and some heat sinks and a fan. If you do everything in this series at least the heat sinks would be a good idea.
$8 (1) Micro SD Card
The primary drive for your Raspberry Pi (sounds scary, I know). Since I am just using the SD card for the OS and some other basic software (Wireguard, Pi-Hole), I went with a 32GB because it was cheap.
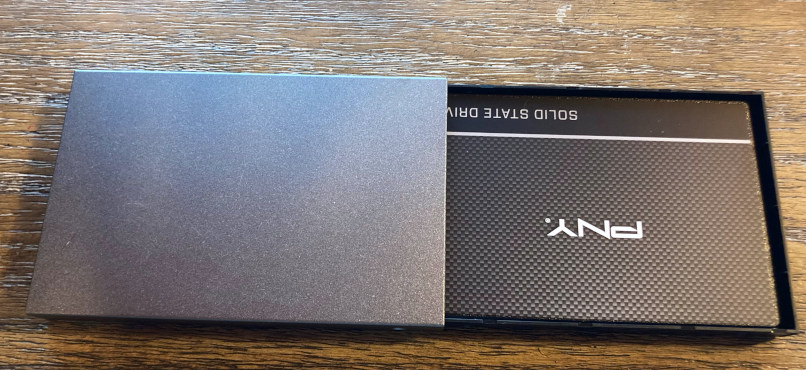
$60 (2) 2.5″ SATA SSDs
These are your standard laptop hard drives. You could go with old-school spinning drives and it probably wouldn’t drastically change the performance since this is getting routed through USB and then the Pi, which probably bottlenecks things. You can get these pretty cheap, such as the PNY drives I use. Better drives do perform better and probably last longer. If I’m happy with this setup I may upgrade in the future.
You may see some guides online using USB thumb drives for a similar setup. I highly discourage you from doing this because those drives are not designed for the constant read-write operations.
$20 (2) 2.5″ Drive Cases (SATA to USB 3.0)
These are cheap and easy to find. The SSKs I use cost about $10 a piece. I picked them because of the aluminum housing. There are all sorts of other options you could go with, but these are about as minimal as you can get.
~$141 Total
You may need to spend a little more for a power cable and case, or any other Pi accessories you may desire. You may also need an adapter or reader to use the SD card on another computer to install the operating system.
Getting Started
1. Install FreeBSD on SD card
Installing FreeBSD is just like installing any other OS on your Raspberry Pi. You can read a detailed guide here. For further details, you can consult the FreeBSD wiki.
2. Set up SSDs
Depending on your enclosure, you might have to attach a couple screws. This step is pretty self-explanatory.
3. Boot Raspberry Pi
Note: I originally tried to boot with the SSDs attached, but for some reason the Pi then tried to boot from them instead of from the SD card. Unplugging the SSDs allowed me to boot. [update] After doing a bit more research, it looks like this behavior is related to uboot and it affects any system that depends on uboot. This bug has been reported several times since at least 2018, so hopefully a fix is forthcoming. If I had to reboot my Pi often, the bug would be bothersome enough that I would probably go with something that doesn’t depend on uboot. Fortunately, I almost never have to reboot the Pi so I’m willing to live with the bug until an update fixes this. It looks like some people have gotten around it by recompiling uboot and disabling its ability to recognize USB. I might do that.
Regular User
username: freebsd
password: freebsd
Root User
username: root
password: root
4. Add user, delete freebsd user, change root password
Even though this is a home setup, you’re still connected to the internet so you don’t want to roll with the default username/password. You can use the adduser command to create a new user.
root@beastie:/ # adduser
Username: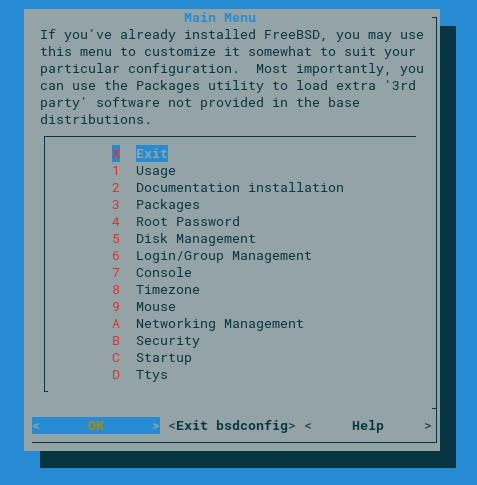
You also want to remove the default freebsd user and change the root password. Log in as root and type bsdconfig. This will provide you with the option to change the root password, as well as provide some other basic configuration options. After you have done this, remove the freebsd user by typing rmuser freebsd.
5. Ports or Packages
An important decision for any FreeBSD install is whether you will go with ports or packages. Ports, the classic way of doing things, provides makefiles that you compile. Packages use a repository (pkg) of pre-compiled binaries, which will feel much more familiar to a normal user.
I will say that, in my experience with FreeBSD, there are advantages to both going the Ports route or the pkg route. pkg is just easier. If you want something that works like APT, Yum, Pacman, or Homebrew, use pkg. On the other hand, with Ports you get all sorts of customization options when you build the software. Half the time I don’t know what most of these do, but sometimes it’s nice. It’s also kind of satisfying knowing that you took the pieces and put something together.
Today I went with ports. I thought perhaps there may be some ports that will compile on ARM64 that may not have an ARM64 pkg in the repo. Perhaps I’m showing my ignorance here. As you can see from this site, I’m a writer, not a software developer. Compiling ports takes much more time than installing a binary, but it’s not like I will install software very often on the Pi. The goal is for the Pi to be an appliance.
See the FreeBSD Handbook for more information.
6. Activate ZFS
Using your favorite text editor (if you come from Linux and use nano, that can be installed through either ports or pkg), add the following lines to /etc/rc.conf
zfs_enable="YES"
zfsd_enable="YES"
zfs_load="YES"
You can then type service zfs start or just reboot your system. note: due to the u-boot bug that won’t allow for the drives to be attached at boot, in the future if you reboot your device you will have to type zpool import [zpool name], where [zpool name] is whatever you name your zpool in the next step. Hopefully the uboot bug is dealt with in the near future. If not I may figure out a work around and make a followup post about it.
7. Identify SSDs and Create ZFS Mirror Pool
There are a couple ways you can identify the SSDs once you have plugged them in. If you don’t want to install anything, you can use camcontrol:
rootroot@beastie:~ # camcontrol devlist
<SSK  7301>                        at scbus0 target 0 lun 0 (da0,pass0)
<SSK  7301>                        at scbus1 target 0 lun 0 (da1,pass1)
I highlighted the drive names, da0 and da1, above. Personally, I prefer using lsblk because it’s a bit clearer. You can install it with PKG or the ports (/usr/ports/sysutils/lsblk/). The standard tool on FreeBSD is df, but it didn’t show the disks. I presume that’s because the disks are unformatted. lsblk results, below:
root@beastie:/ # lsblk
DEVICE         MAJ:MIN SIZE TYPE                                          LABEL MOUNT
da0              0:114 233G -                         diskid/DISK-DD5641988392C -
da1              0:123 233G -                                                 - -
mmcsd0           0:79   30G MBR                                               - -
  <FREE>         -:-   1.0M -                                                 - -
  mmcsd0s1       0:86   50M fat32lba                          msdosfs/MSDOSBOOT /boot/msdos
  mmcsd0s2       0:87   30G BSD                                               - -
    <FREE>       -:-    29K -                                                 - -
    mmcsd0s2a    0:90   30G freebsd-ufs                              ufs/rootfs /
  <FREE>         -:-   512K -                                                 - -
Another easy way to identify the names of your drives is to use bsdconfig and then select “Disk Management.”
Next, we create a ZFS mirror pool using our two drives:
root@beastie:/ # zpool create nexus mirror da0 da1
root@beastie:/ # zpool status
  pool: nexus
 state: ONLINE
config:

	NAME        STATE     READ WRITE CKSUM
	nexus       ONLINE       0     0     0
	  mirror-0  ONLINE       0     0     0
	    da0     ONLINE       0     0     0
	    da1     ONLINE       0     0     0

errors: No known data errors
Interestingly, now lsblk becomes useless as it doesn’t identify the ZFS pool. Now, as FreeBSD intended, we can use df.
root@beastie:/ # df
Filesystem             1K-blocks    Used     Avail Capacity  Mounted on
/dev/ufs/rootfs         30129436 4230352  23488732    15%    /
devfs                          1       1         0   100%    /dev
/dev/msdosfs/MSDOSBOOT     51096   25084     26012    49%    /boot/msdos
tmpfs                      51200       4     51196     0%    /tmp
nexus                  235667180      96 235667084     0%    /nexus
As you can see, the pool “nexus” can now be treated like a single disk.
Next we need to create a filesystem on the pool.
root@beastie:~ # zfs create nexus/fs0
root@beastie:~ # zfs list
NAME        USED  AVAIL     REFER  MOUNTPOINT
nexus       612K   225G       96K  /nexus
nexus/fs0    96K   225G       96K  /nexus/fs0
If you want to create a mountpoint that goes directly to the filesystem you can do the following:
root@beastie:/ # zfs set mountpoint=/nexus0 nexus/fs0
root@beastie:/ # ls
.cshrc		boot		lib		nexus		sbin
.profile	dev		libexec		nexus0		tmp
.snap		entropy		media		proc		usr
COPYRIGHT	etc		mnt		rescue		var
bin		home		net		root
I probably should have gone with a better naming convention. Oh well.
What’s annoying about the u-boot bug is that we can’t have the pool mount on startup. In fact, the only way to start up is to disconnect the drives and then reconnect them after the Pi has booted. You’ll have to re-import the pool using the following:
root@beastie:/ # zpool import nexusI’ll submit a bug report. If it gets fixed I’ll update this guide.
8. Set Up File Server
I chose to go with NFS because it’s more “unix” and it’s built into FreeBSD.
First, set up the appropriate daemons in /etc/rc.conf. Check out the Handbook to see what these do.
nfs_server_enable="YES"
mountd_enable="YES"
rpcbind_enable="YES"
Save and then enter service nfsd start to run the service (or restart).
Next, we need to tell NFS which folder to share. We go to /etc/exports (you may have to create the file) and type the following:
/nexus0 -network 192.168.1.0/24Replace “nexus0” with whatever you named your mount point and “192.168.1.0/24” with your local area network. What’s important is the second to last number, in my case, 1. You can figure out your local network by typing ifconfig.
root@beastie:/ # ifconfig
genet0: flags=8843<UP,BROADCAST,RUNNING,SIMPLEX,MULTICAST> metric 0 mtu 1500
	options=68000b<RXCSUM,TXCSUM,VLAN_MTU,LINKSTATE,RXCSUM_IPV6,TXCSUM_IPV6>
	ether dc:a6:32:c8:28:4d
	inet 192.168.1.2 netmask 0xffffff00 broadcast 192.168.1.255
	media: Ethernet autoselect (100baseTX <full-duplex>)
	status: active
	nd6 options=29<PERFORMNUD,IFDISABLED,AUTO_LINKLOCAL>
lo0: flags=8049<UP,LOOPBACK,RUNNING,MULTICAST> metric 0 mtu 16384
	options=680003<RXCSUM,TXCSUM,LINKSTATE,RXCSUM_IPV6,TXCSUM_IPV6>
	inet6 ::1 prefixlen 128
	inet6 fe80::1%lo0 prefixlen 64 scopeid 0x2
	inet 127.0.0.1 netmask 0xff000000
	groups: lo
	nd6 options=21<PERFORMNUD,AUTO_LINKLOCAL>
Above I highlighted the local IP of the Pi. That means that everything on the network will have an IP of 192.168.1.x, with the router typically being 192.168.1.1. In the exports file, by using 192.168.1.0/24, the /24 means that we allow any device on this network to access the NFS share. If you want to have a more restrictive setup, please consult the Handbook.
Finally, we’ll want to change the permissions of the mount folder so anyone can read/write:
root@beastie:/ # chmod -R 777 nexus0Again, this setup lacks any restrictions so if you’re looking for a more secure setup, you’ll have to do some research. If you want to add some basic security, instead of allowing any device on the local network to mount the folder in exports, you can assign ownership to a particular user and then use chown to change the ownership of the folder to that user. However, I must warn you that I believe that those types of setups can be a bit more difficult to configure on the client side, and if you want a home network that allows you to easily add and remove devices, that might not be the way to go.
Conclusion
You now have a home NAS using a Raspberry Pi and FreeBSD. If you’re unsure how to connect your devices to the NFS server, I wrote a helpful guide that will cover most systems.