Today I had to install a Cloudflare Origin Server Certificate on my FreeBSD server. If you happened to come to the site in the last 24 hours and you noticed that it was down because of certificate issue, I apologize. I forgot to set a cronjob to renew my Let’s Encrypt certificate automatically. However, I didn’t bother doing that. Since I use Cloudflare, I set up a Cloudflare Origin Server Certificate, instead. There are a couple advantages to this:
- The certificate lasts for 15 years. No more pesky renewals.
- Cloudflare makes it easy to set up the certificate
- The certificate is just to encrypt the web server’s communication with Cloudflare; the encryption between Cloudflare and the end user is handled by a different certificate
The only downside is that you have to proxy your traffic through Cloudflare. For example, if I were to turn off my Cloudflare proxy your browser wouldn’t trust my certificate. As far as the browser is concerned, it’s no better than a self-signed certificate. However, if you’re using Cloudflare in the first place this doesn’t seem like much of a downside. After all, the Cloudflare proxy is probably the primary reason you use their services.
Step 1: Generate Cloudflare Origin Certificate
I’m assuming you already use Cloudflare as your DNS server and you proxy traffic through Cloudflare. This means, in your DNS settings, the little cloud is orange.

Now, on the menu to the left-hand side, navigate to SSL/TLS –> Origin Server. At this page, click the button that says, “Create Certificate.”
For the next screen, leave the defaults as they are unless your needs are particular. These are RSA 2048 encryption that will cover your domain name and any possible subdomains, and last 15 years. Click “Create” to go to the certificates.
On the next screen, you will be presented with your public/private certificates:
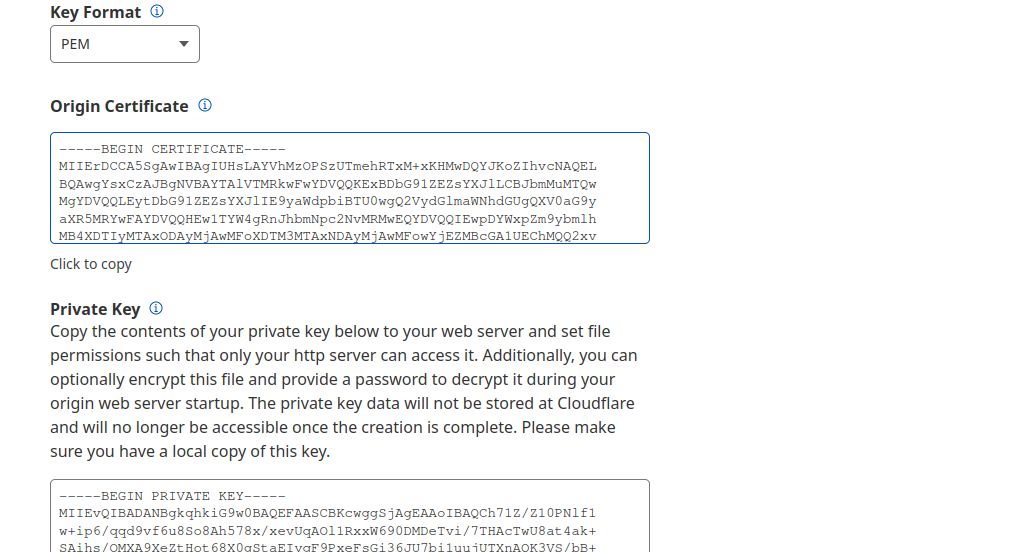
IMPORTANT: You must have these copied to a secure location before leaving this page. You will be able to access the origin certificate later but this will be your only opportunity to view the private key.
Step 2: Install Certificates on Your Server
First, create a folder where you will store your certificates. I chose /usr/local/.cloudflare. Perhaps you might want to put it in /usr/local/etc/.cloudflare or maybe under the root folder /root/.cloudflare. Either way, I recommend you make the folder hidden (the period before the title makes it hidden).
~ mkdir /usr/local/.cloudflareOpen a text editor and copy the text from your Origin Certificate and save it in the folder you created. The name can be anything you like but it needs to end in the .pem extension. For example, you could call it origin.pem. Do the same thing with your private key, calling it something like priv.pem.
Step 3: Configure Apache
First, find the following lines in /usr/local/etc/apache24/extra/httpd-ssl.conf and edit them accordingly:
SSLCertificateFile "/usr/local/.cloudflare/origin.pem"
SSLCertificateKeyFile "/usr/local/.cloudflare/priv.pem"
This next part will depend on how your server is configured. Most Apache users have their domains configured at “virtual hosts” even if they don’t have multiple domains served through the server. If you’re unsure, check /usr/local/etc/apache24/extra/httpd-vhosts.conf. If you see your site configured in this file, change/add the following lines above for the virtual host for your domain serving under port 443 (just look for the number 443).
Obviously, if you used a different folder location or names for your certificates, change those to the appropriate values.
If your httpd-vhosts.conf file makes no mention of your site and just has default values (or if the file doesn’t exist at all), open httpd-ssl.conf and search for the SSLCertificateFile and SSLCertifcateKeyFile and fill them out as needed. If this file doesn’t exist, or if the extra folder itself doesn’t exist, you can add these lines to your /usr/local/apache24/httpd.conf file and they should work assuming Apache is configured for SSL (sorry, not part of this guide, maybe I’ll do that later).
Keep in mind that there are all sorts of Apache server implementations, especially if you’re using a larger piece of software that installed Apache. The method I described above covers a default Apache install on FreeBSD with a single site running. If you have multiple sites running the certificate you identify in httpd-ssl.conf might be different from that in httpd-vhosts.conf. In this case the former would be the certificate for the server, the latter the certificate for the website.
If your Apache install looks different, don’t be too concerned. It all comes down to the httpd.conf file. All the folders in extra or any other folder containing config files are just ways that the installation has broken up the httpd.conf file into smaller pieces. You can trace the folders/files your httpd.conf file is importing by reading through it. It’s all plain text, so this isn’t very difficult.
Conclusion
Congratulations, you now have an SSL certificate that you won’t have to worry about for the next 15 years. If you had any problems or if I missed anything, please contact me at [email protected].